Photographing the night sky may seem extremely difficult, but it’s really just another form of landscape photography!
Once you know all the tips and tricks, you can capture stellar night sky photos.
Capturing the natural beauty of your surroundings at night can be an amazing experience, and below, I’ll share everything you need to know to get started.
What Are the Types of Night Sky Photography?
It’s important to understand the different aspects of the night sky to best prepare for the type of images you would like to capture.
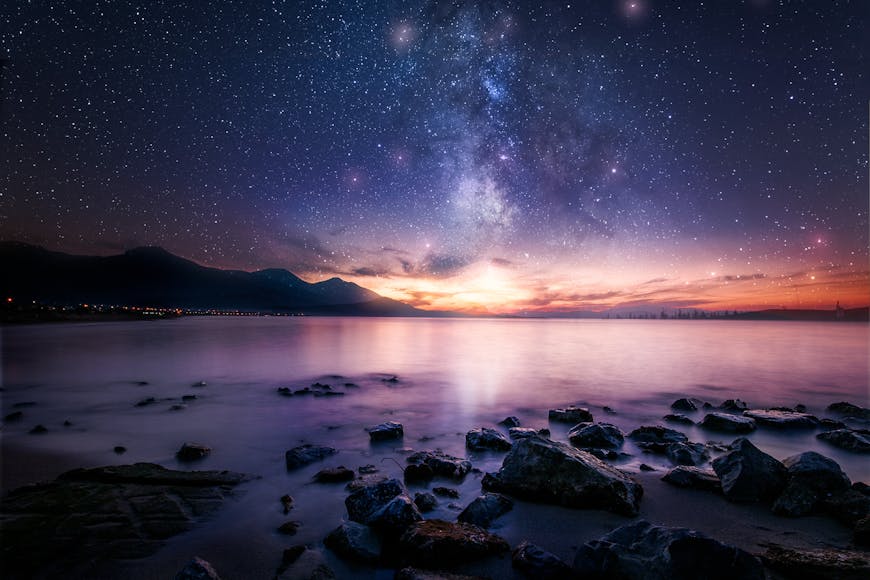
Nightscape
A nightscape is simply a landscape image captured at night, which requires the use of long exposures.
It could be a cityscape capturing the city’s lights at night or a landscape image of a rural setting capturing the stars above a structure or paddock.
Lunar Surface

How you capture the moon depends on the moon phase it’s currently in, which in turn affects its brightness.
Capturing the moon’s lunar surface and all of the craters’ details requires an accurate exposure, so it’s important to know your camera settings.
A full moon is much brighter than a half moon, which is brighter again than a crescent and new moon.
The darker the moon’s surface and the more shadows present, the longer the time required for the correct exposure.
Using a telephoto lens at high zoom and a narrower aperture of f/8 – f/16 will help you capture all of the details of the moon’s lunar surface.
To go deeper, check out our guide to moon photography.
Wide Angle Milky Way

Find a location with the least amount of light pollution possible and, similarly, pick a night when there’s a new moon to ensure the sky is at its darkest.
Cloud cover will affect how clearly you see the Milky Way, so it’s best to wait for clear skies to ensure you can get crisp images!
A wide-angle lens is necessary to capture the Milky Way in its full scale, as is a wide aperture – as low as your camera will allow (preferably f/2.8 or lower).
Due to the earth’s rotation, you can only expose your image for a short time before star trails appear. The 500 rule can be used to calculate the maximum exposure time before star trails appear:
- Full frame camera: maximum exposure time (in seconds) = 500/focal length
- Crop sensor camera: maximum exposure time (in seconds) = 500/(focal length x 1.5)
Star Trails

You have two options if you want to capture star trails as a creative technique.
You can capture one single long exposure using a very low ISO. This would require approximately a 60-minute exposure, which can introduce noise to your images due to the camera sensor heating up and can be difficult to achieve in areas with light pollution.
The second and recommended method for capturing star trails is stacking. This method allows up to 120 consecutive images to be captured with a 30-second exposure each and combined with digital editing software.
This method reduces the risk of ruining a single long exposure through outside factors such as dead batteries or tripod movement.
How Much Do You REALLY Know About Photography?! 
Test your photography knowledge with this quick quiz!
See how much you really know about photography…

Using a longer focal length will allow for longer star trails over a shorter exposure time.
Based on the 500 rule from above, using a 35mm lens would require an exposure time of at least 15 seconds to create star trails, whereas an 85mm lens would only require an exposure time of 6 seconds.
Using a sturdy tripod, a remote shutter release to prevent camera shake, and continuous shooting mode, you can set your shutter speed to the desired exposure time and capture a set of images that can be stacked to create one final image.
For some helpful pro tips, check out our guide to photographing star trails.
Planetary Bodies
Night sky photographers can capture five visible planets: Mercury, Venus, Mars, Jupiter, and Saturn.
At a focal length of 300mm or below, these five planets will each appear as a bright star in the night sky, although other characteristics such as colour and size will help to distinguish them from other stars.
Preparing to determine the position of the planets based on their orbits of the sun will allow you to plan for photographic opportunities.
Deep Sky

Deep sky photography includes capturing images of galaxies or star clusters. As you can imagine, this can be quite difficult, but the results are amazing!
Long exposures are required; therefore, keeping images sharp throughout the exposure (preventing star trails) is challenging, and a good understanding of manual mode functionality is necessary.
Entry-level camera-mounted star trackers can be purchased to ensure that you achieve sharp focus of the galaxy or star cluster that you’re photographing while having long exposures of 30 seconds up to 5 minutes on your DSLR camera (DSLR camera’s sensors get heated and introduce noise with exposure times over 5 minutes).
With a star tracker attached to your camera mount and sturdy tripod, and ensuring accurate polar alignment for your latitude with the star tracker (northern hemisphere aligns with Polaris, southern hemisphere with Sigma Octantis), you will be able to utilise the long exposures needed to let in as much light as necessary to capture the deep sky.
What Gear Do I Need for Night Sky Photography?
If you want to become a night sky photographer, here are a few pointers on the equipment you may need.
Best Camera for Night Sky Photography
Full frame cameras with a 35mm sensor will allow you to capture the best night sky photos, especially those with high ISO capabilities and great colour range.
For Canon, this would include:
For Nikon, this would include:
For Sony:
Best Lens for Night Sky Photography
It’s important to choose a fast lens (aperture of f/2.8 or wider) to capture the Milky Way and other star photos and a wide-angle lens (35mm or wider) to capture all of the night sky in your image.
Here are a few lenses I recommend. Be sure to match the lens mount with your camera so that it fits!
Also check out our guide to the best lenses for night photography.
Other Recommended Equipment for Night Sky Photography
Other essentials for capturing the dark skies include:
- A very sturdy tripod to capture long exposures in windy conditions (recommend to use a ball-head mount as they are easier to use in the dark)
- A remote shutter release to prevent camera shake
- A flashlight or headlamp
- Warm clothes and sturdy shoes
- Some snacks or beverages, as you’ll be out there for a while!
If you want to take your star shots to the next level, you can consider investing in a telescope for astrophotography.
Planning Your Night Sky Shoot

Timing and planning are important aspects of astrophotography. Before photographing the night sky, scout the location and familiarize yourself with the night sky using apps.
Light pollution is a major problem with astrophotography, so choosing a location with little ambient light that can come from street lights or other houses is important.
Best Apps to Use When Planning Your Night Photography
Apps can help you to track the moon’s phases and where the planets or Milky Way will be at a certain time of the night.
They can also track the trajectory of these components, so they can help you determine when, for example, the Milky Way may be in the correct location in accordance with a landscape you’re trying to incorporate into your image.
Some of the best apps are listed below:
- Photo Pills
- SkySafari 7 Pro
- Night Sky 11
- Star Walk 2
- SkyView
Night Sky Photography Settings
Camera settings will vary depending on your subject and other contributing factors at night, affecting the final exposure you aim to achieve.
Knowledge of manual mode is definitely helpful, but here are a few guidelines to get you started!
It’s important to note that manual focus is the best way to achieve sharp images, as the autofocus can struggle in low-light settings.
Photographing the Moon

- Aperture (f-stop) f/11
- ISO 100
- Shutter Speed 1/250
Photographing the Milky Way
- Aperture (f-stop) f/2.8
- ISO 1600+
- Shutter Speed 8- 15 seconds (ensure you incorporate the 500 rule as detailed above)
Capturing Star Trails

- Aperture (f-stop) f/16
- ISO 400
- Shutter Speed (SS) 32 minutes for a single exposure – most DSLR cameras get too hot at such long exposures, so it is best to use the focus stacking method and keep SS between 30 seconds and 5 minutes. Utilise ISO to balance the exposure.
Tips for Focusing in the Dark

Focusing in the dark can be tricky, so here are a couple of tips to help!
- Focus on bright stars or planets: Find the brightest star in the sky and compose it in the middle of your image. Adjust the star to be as small as possible and sharp using manual focus.
- Capture a practice shot: Use higher ISO settings and take a shorter photo (faster shutter speed) to ensure you achieve focus. Then, you can adjust your settings without moving the camera.
- Use a light: You will need a fairly bright light to shine on an object in the distance; the further away, the better. Use manual focus on the subject while illuminating it with the flashlight, then turn off the light to capture your images!
5 Tips for Better Night Sky Photography
Tip 1 – Capture Your Images in Dark Skies
If you have any light pollution, this will affect the quality of your images, so aim for the darkest sky you can find.
The moon is also a source of light pollution if you’re trying to capture star shots, so if you’re capturing star trails or the Milky Way, the best time is around the new moon when the sky is darkest.
Tip 2 – Use a Tripod
Camera shake can ruin an image you’ve spent a long time trying to capture, so it’s best to use a tripod and remote camera shutter.
Tip 3 – Plan in Advance

Use apps to track the trajectory of the Milky Way or to determine your moon phase so that you know exactly when and where your subject will be in the right location!
Tip 4 – Use Manual Focus
Switch your camera to manual focus, as autofocus will struggle in astrophotography’s low-light settings.
Tip 5 – Remember Composition

Other landscape components can add depth to your images. Simply capture an in-focus foreground image, then a shot of the stars, and stack the images using post-processing software.
Timelapse Night Sky Photography
Timelapse photography creates a video of the stars’ progression across the sky through the night, condensing a few hours into a few seconds.
All of the same guidelines and gear apply, but planning is key to ensure you anticipate how the stars will move.
The stars appear to move anti-clockwise or from east to west. Therefore, if you are looking north or south, the stars will create a circular pattern, whereas if you are looking east or west, the stars will move across the image.
To calculate the time-lapse length necessary to achieve the desired result, you need to choose a frame rate of 60, 30, or 24 frames per second (fps), which indicates how many still photos are in one second of video.
Higher frame rates make motion look smoother, and time passes faster.
Set up your camera to shoot a time-lapse pointing at the view you wish to capture and set your shutter speed to ensure there is no blur in the stars from the earth’s rotation (around 20s).
Balance your other settings to achieve a correct exposure, and take a test shot. Check your images are in focus. Now, set your camera to capture your time-lapse!
How to Do Night Sky Photography on a Phone

Night Sky Photography with iPhone
Newer iPhone models have night mode software that can blend multiple images into one single image.
Night mode is automatically activated when in low light and can be seen in the top left-hand corner of your screen with the moon icon, which is yellow when night mode is activated.
You can set the exposure time using either the 1x wide lens or the 2x telephoto lens using the slider, which goes from turning night mode off to maximum exposure.
Then click the shutter and hold your phone as still as possible to capture your starry image.
Night Sky Photography with Android
As with iPhones, Android phones have a night mode that can be activated via the camera app. Once the app is open, swipe to More, then tap Night.
You can zoom in while in Night mode and press capture. Once you’ve taken your photo, the phone will automatically combine 30 images into one clear, well-lit picture.
FAQs
What is photography of the night sky called?
Photography of the night sky is called astrophotography. It involves capturing images of celestial objects like stars, planets, and galaxies, often requiring specialized equipment and long exposure times.
How do I start night sky photography?
Once you have obtained a camera, a fast wide lens, a remote shutter, and a tripod, plan your shoot with an app. Choose a clear night away from other light sources, adjust the camera settings to achieve the correct exposure, and use manual focus to ensure that the subject is in focus.
What lens should I use for night sky photography?
A 35mm or wider wide-angle lens with a low aperture allows you to capture the whole scene in one image, and the fast lens allows for better exposure on dark nights.
What is the 500 rule in night sky photography?
The 500 rule determines the exposure time required before the earth’s rotation causes star trails in your images. The formula for a full-frame camera is: maximum exposure time (in seconds) = 500/focal length.
What is the best shutter speed for night sky photography?
This depends on the exposure required and what you are photographing, but generally, between 10 – 20 seconds works best.
What is the best focal length for night sky photography?
Wide-angle lenses (35mm or wider) are best for capturing the scale of the night sky.
Is Nikon or Canon better for night sky photography?
If your camera can shoot in manual mode, has good ISO capabilities, can focus manually, and can connect a remote shutter and tripod, it can capture beautiful star shots regardless of the brand.
Credit : Source Post


