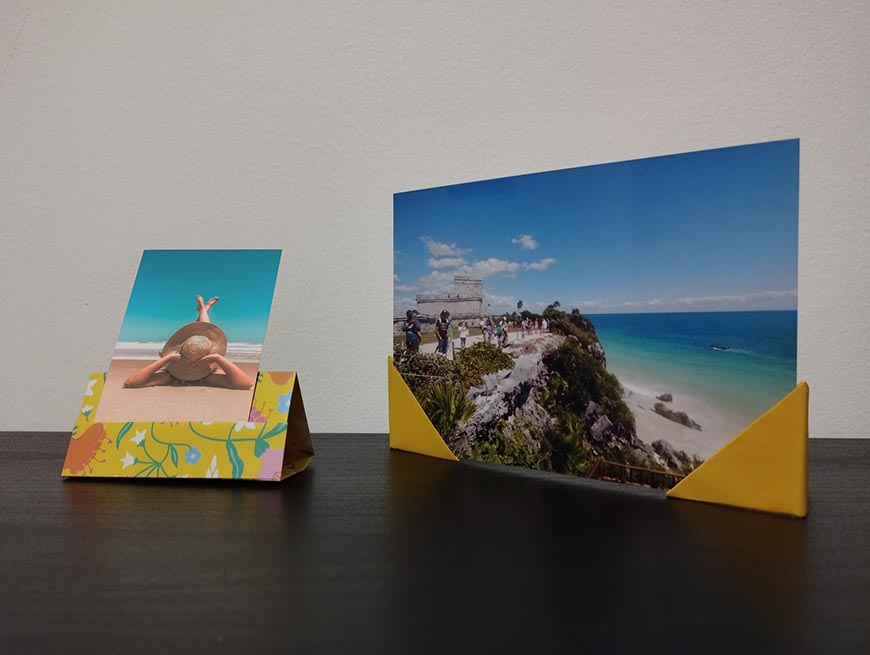
If you’re looking for fun ways to display your photos, why not try DIY photo stands?
You can use many techniques and materials to make a photo stand yourself. I opted for some origami paper photo stands.
Origami is the Japanese art of folding paper to create objects and figurines. It’s an art that can be mastered to the highest level.
I’m not an expert, but I decided to give it a go and make a couple of easy photo stands – and if I could do it, you can too!
I’ll show you step-by-step what you need to do, and you’ll see how fun it is. You’ll have colorful and creative stands to showcase your most precious photos.
More fun DIY photo projects:
This photo stand is perfect for portrait-oriented photos. Of course, you can make a bigger one to hold landscape-oriented photos or larger prints.
Materials
A square of origami paper. You can choose the color and pattern according to your taste.
If you can’t find origami paper, you can try a different kind. Remember that it needs to be thin enough for all the folds but thick enough to hold its shape when you put the photo on it.
The size will depend on the size of the photo you want to put in it. I used the standard origami paper sized 15 x 15 cm. This resulted in a small paper stand that’s perfect for photo cards or instant photos taken with the Instax Mini camera.
Process
Step 1

Start by folding the square in half. Apply pressure to the fold so it’s very clear, and then unfold it.
Then, take one side and fold it so that the outer edge of the paper aligns with the first fold. Then, unfold it and repeat the process on the other side.
Step 2

At this point, you’ll have three vertical folding lines that mark four equal segments.
Now that this is done, rotate the paper 90 degrees and repeat the process. By the end, the folds should mark nine equal squares, like in the photo.
Step 3

Now, flip over the paper and fold the bottom part upwards so that the edge of the paper aligns with the first folding mark to make a little pocket.
Step 4

Flip the paper again, maintaining the pocket on the bottom side. Now, fold the sides so they meet in the middle.
Step 5

Take the upper edge of the paper and put it inside the little pocket at the bottom. Make sure the horizontal fold lines bend as they should so that you create a pyramid. You can pass your fingers along to make sure the angles are crisp.
Step 6

That’s it – your photo stand is ready! Simply put the photograph in the pocket to display it.
If you want, you can further decorate the pocket by writing something or adding scrapbook stickers.
This photo stand consists of two independent pieces meant for the picture’s corners. Therefore, you can use it with photographs of different sizes.
Materials

You just need two rectangles of origami paper. You can use any size if you keep a 2:1 proportion. I’m using 15 x 7.5 cm, which I made by cutting one of the standard origami sheets used in the previous method in half.
As I mentioned in the previous method, you can also experiment with other types of paper if you don’t have origami paper.
How Much Do You REALLY Know About Photography?! 🤔
Test your photography knowledge with this quick quiz!
See how much you really know about photography…

Process
Step 1

Fold the rectangle in half, following the short side, and then unfold it.
Step 2

Take the bottom left corner and fold it to meet the top of the folding mark you made before.
Step 3

Take the top right corner and fold it towards the middle so that it touches the bottom of the folding mark. This should form a parallelogram.
Step 4

Now, rotate the paper slightly to the left so that the straight edge is parallel to the table’s edge. Once you have it like that, fold the left corner towards the center, following the bottom edge.
Step 5
Repeat step four on the opposite side, but this time unfold it after you make the crease.
Step 6

Now, take the corner on the left and fold the triangle upwards, following the diagonal line.
Step 7

Next, insert the corner that’s loose on the right side into the pocket created by the triangle on the left.
Step 8

Lastly, fold the triangle in half. This is the first corner stand.
Step 9

Repeat steps one to eight to make a second corner.
Step 10
Insert the bottom corners of your photo into the origami corners.

Make sure the long edge of the triangle is facing down. If the photo is not standing well, push it a little bit to the back to make a crease on the paper corner you built – this will give it enough balance.

And there you have it – your DIY paper photo stand can be used with any size photo you like.
Credit : Source Post


