A graphic design process refers to a series of predefined steps and guidelines a graphic designer follows to help them complete design projects and meet client expectations.
In addition to creativity, design work also requires a set of logical steps to ensure the successful completion of a task. These steps incorporate key elements such as communication, problem-solving, and critical thinking.
Come along as we explore these essential design steps and how they can elevate your graphic design process.
f
Steps of the Graphic Design Process
Even with the constantly evolving graphic design trends, the logical steps necessary to create amazing designs remain unchanged.
Here’s the step-by-step graphic design process followed by professional designers:
Step 1: The Creative Brief
The creative process starts with a creative brief, which sets the tone and serves as a guiding light for the entire project.
To put together an effective brief, a graphic designer first meets with the client and gathers as much relevant information as possible about their brand, its offerings, requirements, and overall expectations for the graphic design project.
This helps the designer understand the scope of the project and what’s expected of the final design.
As such, a good creative brief must include information such as:
- Brand guidelines
- Target audience
- Client information
- Project timelines
- Final product
- Delivery format
- Budget
Note: If the client has strong ideas of how the final designs should look, have them include any relevant links or inspirations for easy reference and optimal clarity.
Step 2: Research
During this stage, a designer conducts research into the subject they will be representing, whether it’s a product or service, as well as undertaking an analysis of the client’s competitors and their designs.
Thorough research provides insight into what works and what doesn’t, helps identify potential issues, and allows you to find ways to make improvements.
Research also helps you find inspiration and design ideas that may inform your approach to completing the job. Consider creating a mood board or a collection of similar designs to help spark ideas during this phase.
Step 3: Building a Wireframe
Credit: Michael Burrows
This is also referred to as the brainstorming stage because this is where you come up with workshop ideas to build a rough framework for the project.
Typically, you’ll use simple shapes to provide a visual representation of the final idea so you have something to show your client to ensure your designs align with their expectations.
Depending on the complexity and requirements of the project, this initial mockup can be simple or detailed, incorporating elements such as colors and brand elements.
For simple mockups, you can use a pen and paper or a design tablet to quickly sketch your ideas – especially if you’re working on small-scale projects.
Where more detail is needed, you’ll want to also use software tools like Figma, Canva, or Adobe Illustrator to create, edit, and store your wireframes.
How Much Do You REALLY Know About Photography?! 
Test your photography knowledge with this quick quiz!
See how much you really know about photography…

Check out more options in this guide to the best graphic design software.
These wireframes are classified into three categories based on how much detail they offer:
- A low-fidelity wireframe is the simplest, and only highlights the basic ideas and outlines to aid design concept development.
- A mid-fidelity wireframe provides a step up in detail and contains a more accurate description of the design layout.
- A high-fidelity wireframe offers the closest representation of what the final product will look like and contains details such as typography, content, and color.
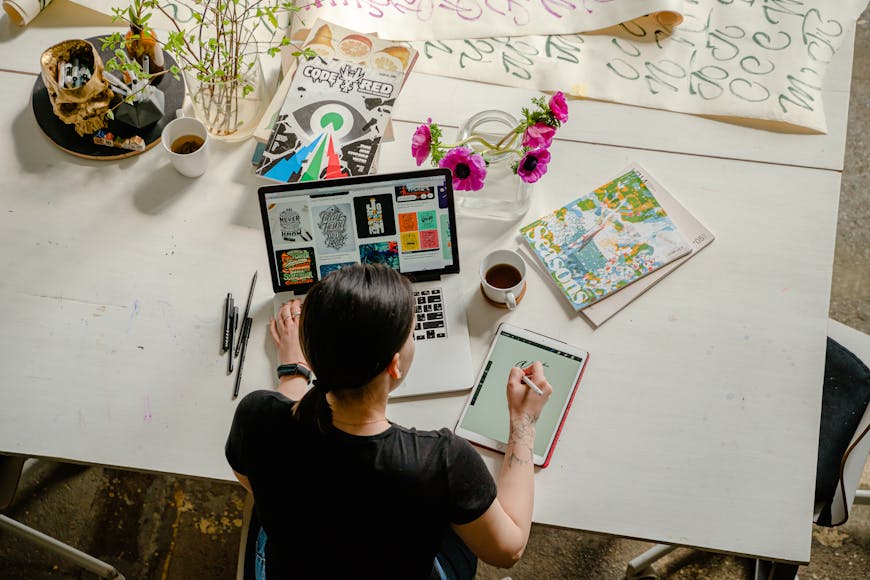
Step 4: Creating the Design

Credit: Theme Photos
After the client and all stakeholders approve the initial concept or mockup, you can proceed to the design stage.
Here, you add design elements like color, shape, typography, space, imagery, and animation to the mockup.
You’ll need to create several iterations of the design to present to the client and have them choose the options they like the best.
This makes for a smoother workflow process that gets the best results quickly while still incorporating the client’s vision.
Step 5: Reviews and Feedback
This is a critical step in the process as it helps ensure the designs align with the client’s expectations.
Depending on the scope of the project, the feedback stage happens multiple times, with graphic designers implementing changes after each round. This goes on until all stakeholders are content with the design, which fully meets their requirements.
One of the most commonly used review techniques is the 10/50/99 strategy, which ensures proper communication and feedback between client and designer through critical milestones.
Following the strategy, you should seek client feedback at:
- 10% done: with the help of a wireframe which is an idea of the direction that the project is headed in.
- 50% done: to ensure that the client’s expectations are visualized in the design.
- 99% done: to get the nitty-gritty and final tweaks out of the way and ensure the client is happy with the final design.
Step 6: Delivery
When the client and other relevant stakeholders approve the updated design, then it’s time for delivery.
Send in the work in the format agreed upon in the brief, using the correct file type and size, so the client does not need to make any edits and can implement the designs into whatever format they need.
Fundamental Principles of the Graphic Design Process
Graphic design involves a lot of principles that allow designers to create high-quality, bespoke designs. In addition to following the design process, your work must adhere to the basic principles of graphic design, which include:
- Alignment: This refers to how the design elements are arranged. Alignment helps ensure the elements are organized in an orderly and visually appealing design.
- Balance: This refers to the distribution of graphic design elements, which can be either symmetrical – where the elements are distributed evenly; or asymmetrical – where scale, contrast, and color help create balance and flow.
- Contrast: This helps maintain the distinction between the different design elements, making sure they are legible and clear. It’s the thing that helps design elements, and indeed the entire graphic, pop.
- Visual hierarchy: This refers to the process of making the most important elements stand out within a graphic. With hierarchy, particular elements are given more weight compared to the others allowing the graphic to be consumed as intended.
- Proximity: This describes the relationship between various elements. Here, distance is used to create and enhance the visual relationships between design elements and eliminate clutter in the design.
- Typography: This refers to the arrangement of letters and text to create a visually appealing graphic.
The Importance of Following a Design Process

Credit: Getty Images
Following a creative design process is a fundamental part of ensuring the successful completion of a design project, and here’s why:
- Aligns expectations: The graphic design process helps align expectations between the designer and sets realistic goals for the final product. The process also gives the client an appreciation of the time and effort that goes into their design, aiding the setting of reasonable deadlines for the project.
- Keeps the project on track: It takes a lot of consideration to create a custom design that reflects a brand’s identity and engages the audience. The process takes all this into account and serves as a guide, keeping things on track until the job is done.
- Enables communication: The design process helps avoid miscommunication. It creates multiple points where the designer and client can exchange feedback and ensure their expectations align.
Final Words
Graphic design is about more than just creating pretty designs; it also involves a lot of critical thinking and problem-solving. Having an established graphics process will help you create better designs, increase your output, and remove many frustrations from your design workflow.
Incorporate a graphic design process into your workflow today to achieve better designs that resonate with audiences and achieve set objectives.
And remember, each step in the creative process is an opportunity to refine your skills and deliver a product that stands out in a crowded marketplace.
Credit : Source Post


