If you’ve ever felt overwhelmed by the array of camera dial modes and how to use them, you’re not alone.
These dials are there to make it easier for you to shoot, but they can seem too complicated at first.
In this guide, I’ll explain the various camera dial modes, what they do, and how to use them.
By the end of this post, you’ll have the confidence to switch modes like a pro and capture stunning photos.
Let’s dive in.
What Do the Different Modes on a Camera Dial Do?
Photo by Rajyavardhan Singh on Unsplash
Camera modes are essential tools to help you shoot images with ease.
They range from fully automatic, where the camera makes all decisions, to manual, where you have complete control.
Common modes include Auto, Program, Aperture Priority, Shutter Priority, and Manual.
Some cameras also offer scene modes for specific shooting situations like landscape, portrait, or macro.
The different dial modes on the camera allow you to focus on the most prominent setting for a scenario and let the camera adjust the rest accordingly.
For example, the aperture priority mode lets the user decide the aperture while the camera determines the right shutter speed for a correct exposure.
Let’s take a detailed look at different dial modes.
The Primary Modes
There are three settings that are crucial for an exposure: Aperture, Shutter Speed, and ISO. Together, they form the exposure triangle, where each value complements the other to create a properly exposed image.
The camera dial modes give you varying levels of control over your camera’s settings, allowing you to capture quickly in different situations.
Auto, iAuto

Credit: Wikimedia Commons
Auto mode is often marked with a green camera icon, which is your camera’s “point-and-shoot” setting.
It’s designed for simplicity – just aim and press the shutter.
The camera analyzes the scene and chooses all settings for you.
Some cameras offer an “intelligent Auto” or iAuto mode, which uses more advanced scene recognition.
This mode is beginner-friendly and results in usable photos in most conditions; however, it’s more suitable for casual photography.
While it’s a convenient way to shoot, Auto mode also limits your creative control.
How Much Do You REALLY Know About Photography?! 
Test your photography knowledge with this quick quiz!
See how much you really know about photography…

Aperture Priority Mode

Credit: Wikimedia Commons
In Aperture Priority mode (A or Av), you control the aperture and ISO while the camera sets the shutter speed.
This mode is perfect for controlling depth of field – great for portraits with blurred backgrounds or landscapes where you want everything in focus.
It gives you creative control over one essential aspect of exposure while the camera handles the rest.
Check out our detailed guide to Aperture Priority mode for more details.
Usually, ISO is controlled by the user in this mode; however, if you switch to auto ISO, you can focus solely on the aperture.
Shutter Priority Mode
Shutter Priority mode (S or Tv) lets you set the shutter speed while the camera chooses the aperture.
This mode is ideal for capturing motion – use fast shutter speeds to freeze action or slow speeds to create motion blur.
It’s great for sports photography, wildlife, or creative effects with moving subjects.
Similar to Aperture Priority mode, you can either choose the ISO or set it to an auto setting where the camera chooses the value for a correct exposure.
Check out this guide to Shutter Speed Priority mode to go deeper.
Manual Mode

Credit: Wikimedia Commons
Manual mode (M) gives you full control over the aperture, shutter speed, and ISO settings.
It’s the most flexible mode, allowing you to fine-tune every aspect of your exposure.
While it requires more knowledge and practice, Manual mode is essential for tricky lighting situations or when you want precise control over your image.
Other modes rely on the camera’s light meter, which dictates the appropriate shutter speed or aperture in priority modes. However, manual mode lets you bypass that by letting you choose the settings yourself.
If you wish to learn more about Manual mode photography, you can check out our comprehensive guide.
Program

Credit: Wikimedia Commons
Program mode (P) is a step up from Auto mode as it offers the best of both in a way.
In Program mode, the camera still sets both aperture and shutter speed, but you can adjust other settings like ISO, white balance, and exposure compensation.
It’s a good transition mode when you’re ready for more control but not quite comfortable with Aperture or Shutter Priority modes.
Some photographers swear by this mode as it offers a good balance of functionality and automatic control.
The Utility Modes
Beyond the primary modes we discussed above, digital cameras also offer various specialized modes that can be termed utility modes.
These modes are designed for specific situations or to give you quick access to customized settings in various shooting scenarios.
Let’s take a look at the utility modes that can make your shooting experience more efficient.
No Flash
No Flash mode, usually represented by a crossed-out flash icon, is essentially Auto mode with the flash turned off.
This is useful in situations where flash is prohibited, like museums or concerts, or when you want to capture the natural ambiance of a scene.
The camera will adjust other settings to compensate for the lack of flash, often resulting in slower shutter speeds or higher ISO in low-light situations.
Video
Video mode, typically marked with a movie camera icon, switches your camera to movie mode. Pressing the shutter button starts recording video.
This mode also has settings for aperture, shutter speed, and ISO, which can be accessed via dials or on-screen menu options.
There are various options available in this mode, including frame rate, color mode, autofocus, and resolution.
High-end cameras allow control over focus and exposure while shooting. However, most entry-level models lack this functionality.
Bulb Mode
Bulb mode (marked as ‘B’ on most cameras) is a long exposure mode controlled by your input. The shutter stays open as long as you hold the button – press once to start, and again to stop.
This is ideal for exposures longer than 30 seconds, which is typically the longest automated shutter speed, or when you manually calculate the shutter speed, and it doesn’t match the default values on the camera.
It’s great for night photography, light painting, or capturing very low-light scenes.
A remote shutter release with a timer is recommended when shooting in the bulb mode.
Custom
Custom modes are often labeled C1, C2, U1, U2, or just 1 or 2 on the camera dials. They allow you to save your preferred settings for quick access.
You can set up one or more custom modes with your favorite combinations of aperture, shutter speed, ISO, white balance, and other settings.
This is very useful if you frequently shoot in similar conditions or if you want to quickly switch between different types of photography without manually adjusting all your settings each time.
Another area, where custom settings shine is when you have a color preference and you save and reuse it over and over again.
The Creative Modes
Creative modes, also known as scene modes, are pre-programmed settings designed to help you capture specific types of shots without needing to adjust individual settings manually.
These modes are particularly useful for beginners or when you need to quickly capture a shot in a specific scenario. Let’s explore some common creative modes you might find on your camera dial.
Landscape

Credit: Wikimedia Commons
Landscape mode optimizes settings for wide, scenic shots. It typically uses a smaller aperture (higher f-number) to increase the depth of field, ensuring both foreground and background are in focus.
The camera may also enhance greens and blues to make the landscape more vibrant. This mode often disables the flash and uses daylight white balance.
Portrait

Credit: Wikimedia Commons
Portrait mode is designed to capture flattering images of people. It usually selects a wider aperture (lower f-number) to create a shallow depth of field, blurring the background to make the subject stand out.
This mode may also adjust color settings to enhance skin tones and enable features like face detection for better focus on your subject.
Sport

Credit: Wikimedia Commons
Sport mode is ideal for capturing fast-moving subjects. It uses faster shutter speeds to freeze the action and often enables continuous autofocus to track moving subjects.
This mode may also increase ISO sensitivity to allow for these faster shutter speeds, even in less-than-ideal lighting conditions.
Night

Credit: Wikimedia Commons
Night mode is designed for low-light situations. It typically uses a slower shutter speed to capture more light and may enable the flash for nearby subjects.
Some cameras combine multiple exposures in this mode to reduce noise. It’s great for evening cityscapes or night portraits, but using a tripod is recommended to avoid camera shake.
Macro/Close Up

Credit: Wikimedia Commons
Macro mode is used for extreme close-up photography. It works in the closest distance of the focus range your lens allows, letting you get close to small subjects like flowers or insects.
This mode often selects a wider aperture for a shallow depth of field, helping your tiny subject stand out against a blurred background.
However, the results vary depending on the lens you’re using; two main factors are focal length and closest focus distance.
Scene
Scene mode (Special Scene mode on Canon) is a catch-all for various specific shooting scenarios.
Depending on your camera, you might find options like Food, Sunset, Snow, Beach, Fireworks, and more.
Each of these applies specific setting combinations optimized for that particular type of shot. While not as flexible as manual settings, these can be helpful shortcuts for quick, decent results in day-to-day shooting situations.
Camera-Specific Dial Modes
While most camera brands follow universal functionalities, some manufacturers have developed unique modes specific to their cameras.
These modes are designed to offer additional functionality or to simplify certain types of photography.
Let’s explore some of these brand-specific modes below.
Guide (Nikon)
Nikon’s Guide mode is an interactive teaching tool built into some of their entry-level DSLRs. It walks you through the process of capturing different types of images, explaining camera settings along the way.
This mode is perfect for absolute beginners who want to learn photography while actually taking photos, as it offers a hands-on approach to understanding your camera’s functionality.
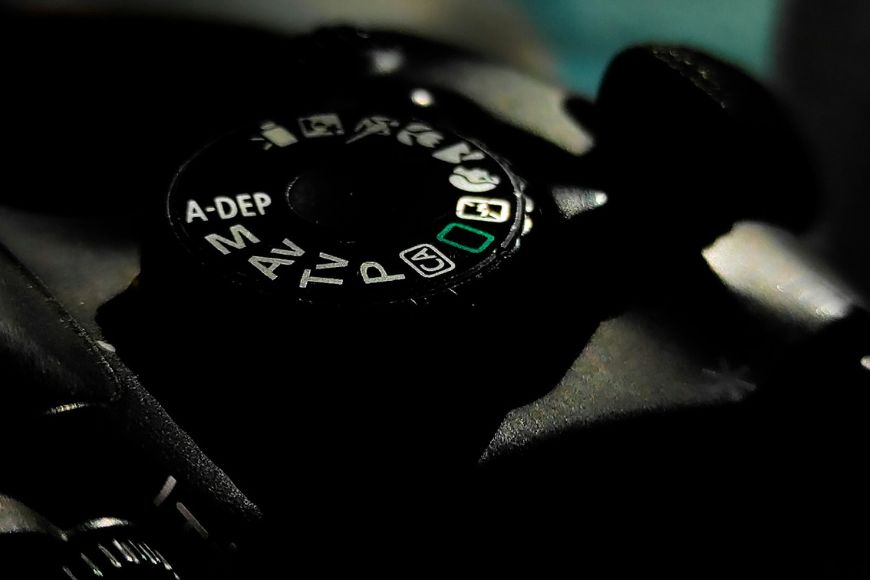
Automatic Depth of Field (Canon)

Credit: Wikimedia Commons
Canon’s Automatic Depth of Field mode (A-DEP) is a feature on some EOS cameras that automatically chooses the best aperture and shutter speed based on the focus range selected by the user.
This feature allows you to select the nearest and farthest points you want in focus in a frame, and then the camera calculates and sets an aperture to ensure everything between them is sharp.
This can be useful for group photos or landscapes where you want automatic depth of field calculation without manually changing the settings.
Creative Auto (Canon)

Credit: Wikimedia Commons
Creative Auto mode, found on some Canon cameras, bridges the gap between full Auto and modes that offer more control, like Aperture and Shutter priority.
It’s essentially Auto mode but with the additional flexibility of changing certain things like brightness, depth of field, color tone, burst mode, and image resolution.
It uses simple terms like “background blur” instead of aperture and “brightness” instead of exposure compensation, allowing you to make creative decisions without needing to understand the technical details.
This mode is great for those looking to expand beyond Automatic mode but who aren’t yet comfortable with the exposure triangle.
Sensitivity Value (Pentax)
Pentax’s Sensitivity Value mode (Sv) lets you set the ISO while the camera chooses the appropriate aperture and shutter speed.
This can be useful in situations where controlling noise is your primary concern or when you’re moving between areas with vastly different lighting conditions and want to maintain a consistent ISO.
Sweep Panorama (Sony)
Sony’s Sweep Panorama mode allows you to create wide panoramic images simply by panning the camera across a scene.
The camera captures multiple images as you sweep, and it then stitches them together automatically and creates a single panorama image.
This mode simplifies the process of creating panoramas, making it accessible even to casual photographers without the need for tripods or post-processing software.
Which Mode Should I Shoot in?

Photo by Joice Kelly on Unsplash
Choosing the right camera mode depends on your skill level, the shooting situation, and your creative goals.
Here’s a guide to help you decide:
If you’re a beginner in photography: Start with Auto mode to get comfortable with your camera. As you learn, try Program mode for a bit more control.
However, for best results, you should learn to control the camera manually, as it allows you complete creative freedom.
For landscapes: Use Aperture Priority mode and set a smaller aperture (higher f-number) for a wide depth of field. Since this reduces light, you may need a slower shutter speed – use a tripod to prevent camera shake.
Alternatively, you can opt for the Landscape scene mode if you prefer automatic settings.
For portraits: Aperture Priority is great for portraits as well; use a wider aperture (lower f-number) to create a blurry background.
You can also switch to Portrait mode if you’re new to photography.
For sports or wildlife: Shutter Priority mode lets you freeze action with fast shutter speeds, which is ideal for unpredictable movements of animals.
For night scenes or light trails: Night scenes or low-light shooting situations can be challenging if you’re new to photography.
In such scenarios, you can either take full control with manual mode or aperture priority if you have a tripod; otherwise, shutter priority would be ideal to avoid blur in the photos.
When you want full control: Manual mode gives you command over all settings like aperture, shutter speed, and ISO. It’s ideal when you’re not rushed and want full creative freedom without relying on the camera’s light meter.
For specific scenarios: You can try the relevant scene modes for specific scenarios like landscape, portrait, sport, night, or macro mode, depending on what you’re shooting.
Make sure you experiment with different modes; start in Auto, then try Program, then Aperture or Shutter Priority, and finally Manual.
Remember, there’s no “perfect” mode for all situations. As you gain experience, you’ll develop an intuition for which mode works best for different scenarios.
Don’t be afraid to try different settings – that’s how you’ll learn and grow as a photographer.
What Is the Best Shooting Mode for Beginners?

Photo by Annie Spratt on Unsplash
For beginners, the Program (P) mode often provides the ideal balance between automation and control. In this mode, the camera handles the fundamental exposure settings (aperture and shutter speed) while allowing you to adjust ISO and white balance and use exposure compensation.
This mode can also be a great learning opportunity, as you can observe the camera’s choices for aperture and shutter speed, helping you understand how these settings affect your images.
Program mode serves as the best stepping stone from fully automatic modes to more advanced shooting modes.
Check out our guide on the best camera settings for beginners to learn more about the ideal settings when you’re just starting out.
7 Tips on Using Camera Dial Modes
- Experiment regularly: Don’t stick to one mode; try different modes in various situations to understand their effects on your photos.
- Use the depth of field preview button: Many cameras have a DOF preview button near the lens mount; it lets you see how your chosen aperture affects the depth of field before taking the shot. It’s especially useful when working with Aperture Priority and Manual modes.
- Keep your firmware updated: Camera manufacturers often release firmware updates that can improve existing modes or add new features. Make sure to check your camera brand’s website periodically for updates.
- Utilize the mode dial lock button: Some cameras have a lock button in the center of the mode dial. This prevents accidental mode changes, which can be useful when shooting in busy environments.
- Use Auto ISO: This feature allows you to set a maximum ISO limit while the camera adjusts sensitivity based on lighting conditions. It’s helpful in Aperture Priority and Shutter Priority modes, giving you an extra layer of automatic control.
- Start with semi-automatic modes: If you’re transitioning from Auto, try Aperture Priority or Shutter Priority before jumping to full Manual. These modes let you control one aspect of exposure while the camera handles the rest.
- Setup your custom modes: Set up your Custom modes (C1, C2, etc.) for scenarios you frequently encounter. This can save time and ensure you don’t miss shots while adjusting settings.
As you practice, you’ll develop an intuition for which mode works best in different situations. Don’t be afraid to switch modes mid-shoot if the situation calls for it – flexibility is key in photography.
FAQs About Camera Dial Modes
What are the best camera dial modes to use?
The best modes depend on your shooting situation and experience level. For beginners, the Program mode offers a good balance of control and automation.
As you gain experience, Aperture Priority, Shutter Priority, and Manual modes give you more creative control over your images.
What mode do professional photographers use?
Professional photographers typically use Manual, Aperture Priority, or Shutter Priority modes. These modes offer the most control over exposure settings, allowing pros to achieve their desired creative results in various lighting conditions.
Which dial modes allow you to use exposure compensation?
Exposure compensation can be used in Program, Aperture Priority, Shutter Priority, and some Scene modes. It’s not available in full Auto mode since the camera controls everything for you.
When should I use scene mode?
Scene modes are useful when you’re in a specific shooting situation and want quick, decent results without adjusting individual settings. They’re useful for beginners or when you need to capture a shot quickly in a challenging environment.
What do the scene modes actually do?
Scene modes automatically adjust various camera settings (like aperture, shutter speed, ISO, and white balance) to suit specific shooting scenarios.
For example, a Sports scene mode would use a fast shutter speed to freeze action, while a Landscape mode might use a smaller aperture for greater depth of field.
Credit : Source Post


